Executing the job is one of the easiest steps, but obviously there are options available beyond the 'vanilla' scenario.
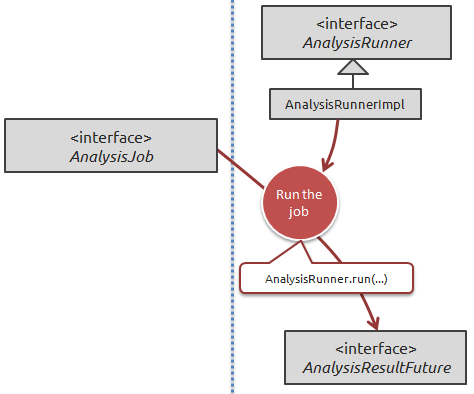
The simple scenario of running the job is to use the plain AnalysisRunnerImpl class, like this:
			AnalysisRunner runner = new AnalysisRunnerImpl(configuration);
			AnalysisResultFuture resultFuture = runner.run(analysisJob);
This will return a AnalysisResultFuture , which under most circumstances represents a still-running job. Your application can continue to do other work in the background, or it can decide to block by calling .await() .
Here's a typical example of handling the result future:
			// block until the job has finished
			resultFuture.await();

			if (resultFuture.isSuccessful()) {
			    // do something with the successful result
			    handleResult(resultFuture);
			} else {
			    List<Throwable> errors = resultFuture.getErrors();
			    for (Throable error : errors) {
			        logger.error("An error occurred while executing job", error);
			    }
			    // usually the first error that occurred is the culprit, so we'll throw that one
			    throw errors.get(0);
			}
You might ask what kind of errors will happen while executing a DataCleaner job? The answer is that it can be a lot of things, for instance:
-
The connection to the source database or resource may fail somehow.
-
One of the components in the job may throw an unexpected exception.
-
One of the components may throw an exception because it's configuration is incomplete or invalid (although this will in most cases be detected while building the AnalysisJob instance).
-
If you're writing data to another datastore, that may also fail for whatever datastore-dependent reasons.
-
If your job is doing something stupid like a Value Distribution of a billion unique IDs, then you'll run out of memory.
Let's now assume that your job has executed succesfully. We'll now look at how you can post-process results and how to save/load them to/from a file.